Dataflow diagram of Yampa reactimate
This blog post was originally written back in 2010-07-10
download: diagram (.svg), fonts (cmr10.ttf, cmtt10.ttf)
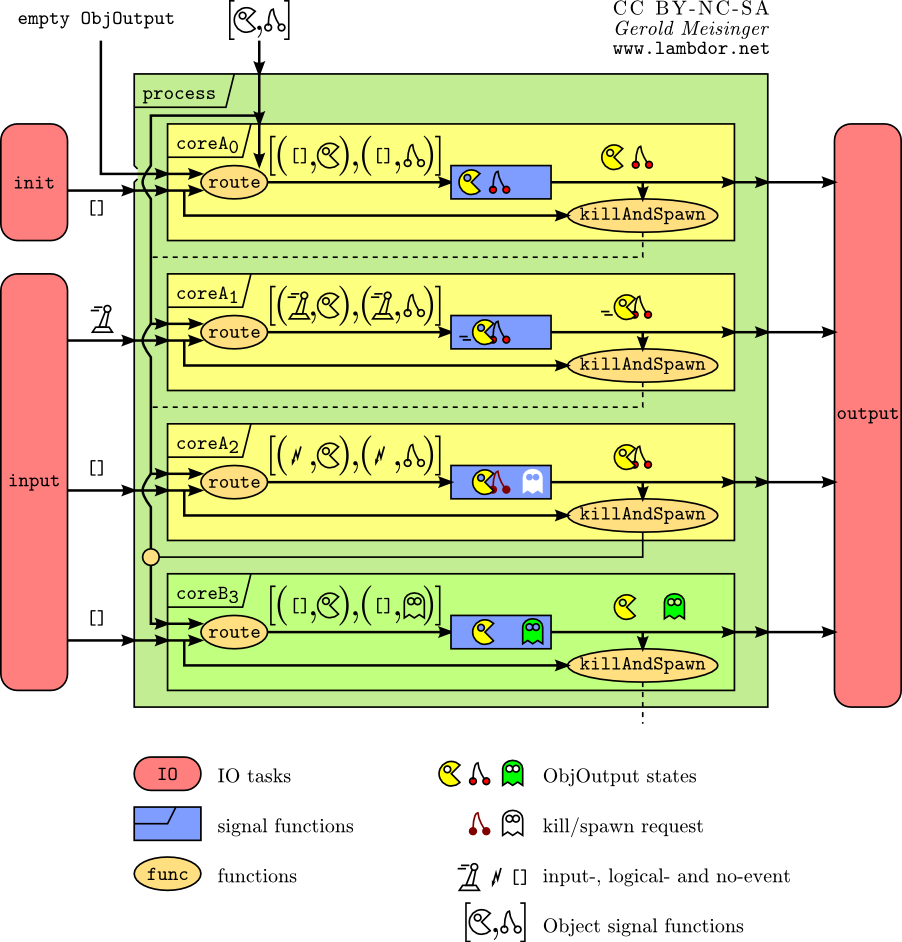
For me as a Haskell beginner the biggest problem in understanding Yampa reactimate was how the objects are actually passed around and transformed as all the signatures are very, very… very generic. This diagram shows an example scenario staring Pacman (the player), a cherry (enemy trigger) and a ghost (the enemy).
Starting at the upper left corner.
Collect input events in
init(which are empty here) and pass them throughprocess, core all the way down torouteandkillAndSpawn.coreis called with an initial empty object state (which is fed-back in recursively! (1)) and an initial list of object signal functions. It is very important to separate the logic of the objects (signal functions) and the output they produce (state).routegets the empty state and no input events, effectively keeping the object collection the same. Note thatkillAndSpawndoesn’t switch in this step. The object states are passed tooutputwhere they are rendered.In the next step (t=1), still having the same core (core=A), the user produces an input event which is routed to all objects and makes the Pacman move to the cherry. route only checks for collision events in the previous state, thus no collision events are recognized in this step.
In t=2, still having the same core (core=A),
routedetects a collision between Pacman and the cherry and produces collision events, which are only routed to the objects in charge. This causeskillAndSpawnto kill the cherry, spawn the ghost and therefore generate a switching event, which results in the creation of a newcoreinprocess.
(I didn’t really know how to illustrate the recursion of core.)